
How to Send a Case via Connect
Follow this tutorial to learn how to send a case to Pro-Tech Dental Arts via Connect!

When scanning in the CEREC Connect software, it is the same process as in the CEREC software. Once you
have added the patient’s info:
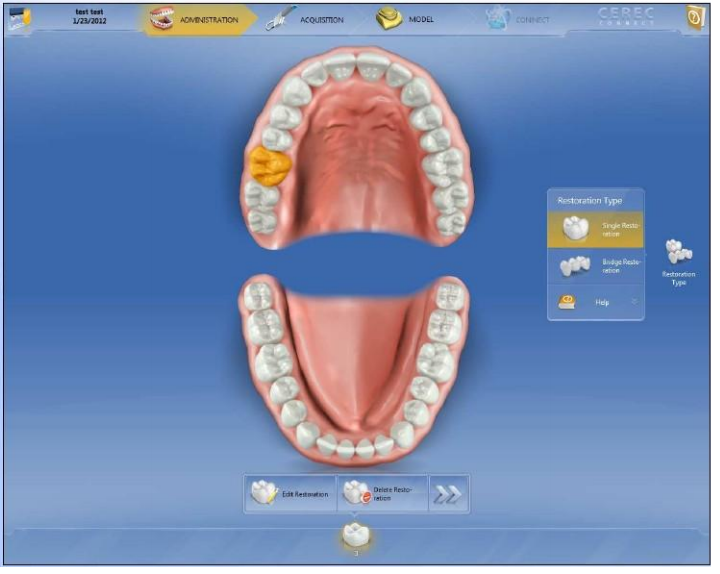
1. Choose whether it is a "Single Restoration" or "Bridge Restoration"
2. Choose which teeth.

Choose whether it’s a:
1. Crown or Inlay/Onlay Full Contour
2. Crown Veneered (Pro-V, PFM)

Choose your materials.
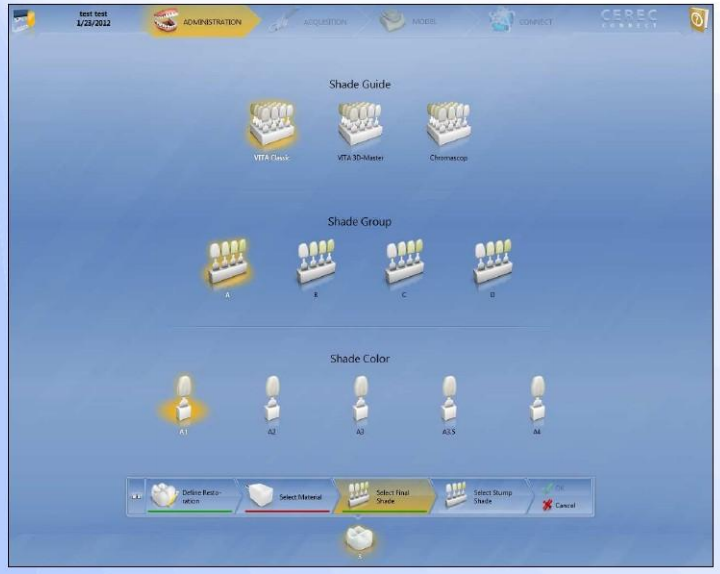
Choose which shade you would like to use.

*Choose a stump shade when necessary.*
Now that everything has been chosen, you are ready to scan.
(**Remember you can always go back and edit before sending it to the lab.**)

Scan:
1. Lower Jaw
2. Upper Jaw
3. Buccal
4. Add Category if needed (Biocopy, Bioreference, etc.)

Draw your margins.

Now you are ready to send the case to Pro-Tech! Just type in your username/password & click log-in!
(If you do not have a username & password, click here to learn how!)

Double check order info.

Choose:
1. Lab
2. Return Date
3. Time
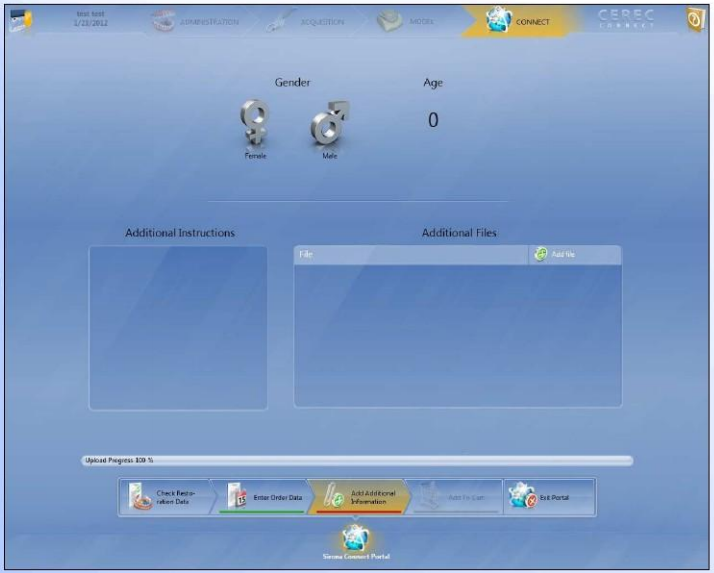
Choose:
1. Gender
2. Age
3. Type in any additional information.
4. Add any additional files.

At this point, the case has not been sent to the lab. It's only in your order cart! Always make sure you click the "Submit Cart" button to send to lab! They will never know that a case is pending if this step is forgotten!

Once "Submit Case" has been chosen. You must verify your username & password. Click OK.
ALL DONE! Congratulations! You have partnered with Pro-Tech Dental Arts via Connect!